Viewing entries tagged
36 exposures

5 Tips to Improve Your Film Photography

4 Comments

5 Tips to Improve Your Film Photography

Moving from digital to film photography has always been a daunting task. Having the perks of shooting unlimited frames, having a nice preview after every shot and ability to post process the images in photoshop or lightroom certainly gives photographers a lot of assurance. However, working with a film is the total opposite and many find it risky. Here are some tips to help you elevate your film photography to the next level!


1. Exposure is KEY - When it comes to film, exposure is the most important thing of all. The film colours and details depend greatly on the exposure. You may use the same film, same camera and lens but with different exposure, the colours and details will vary greatly.

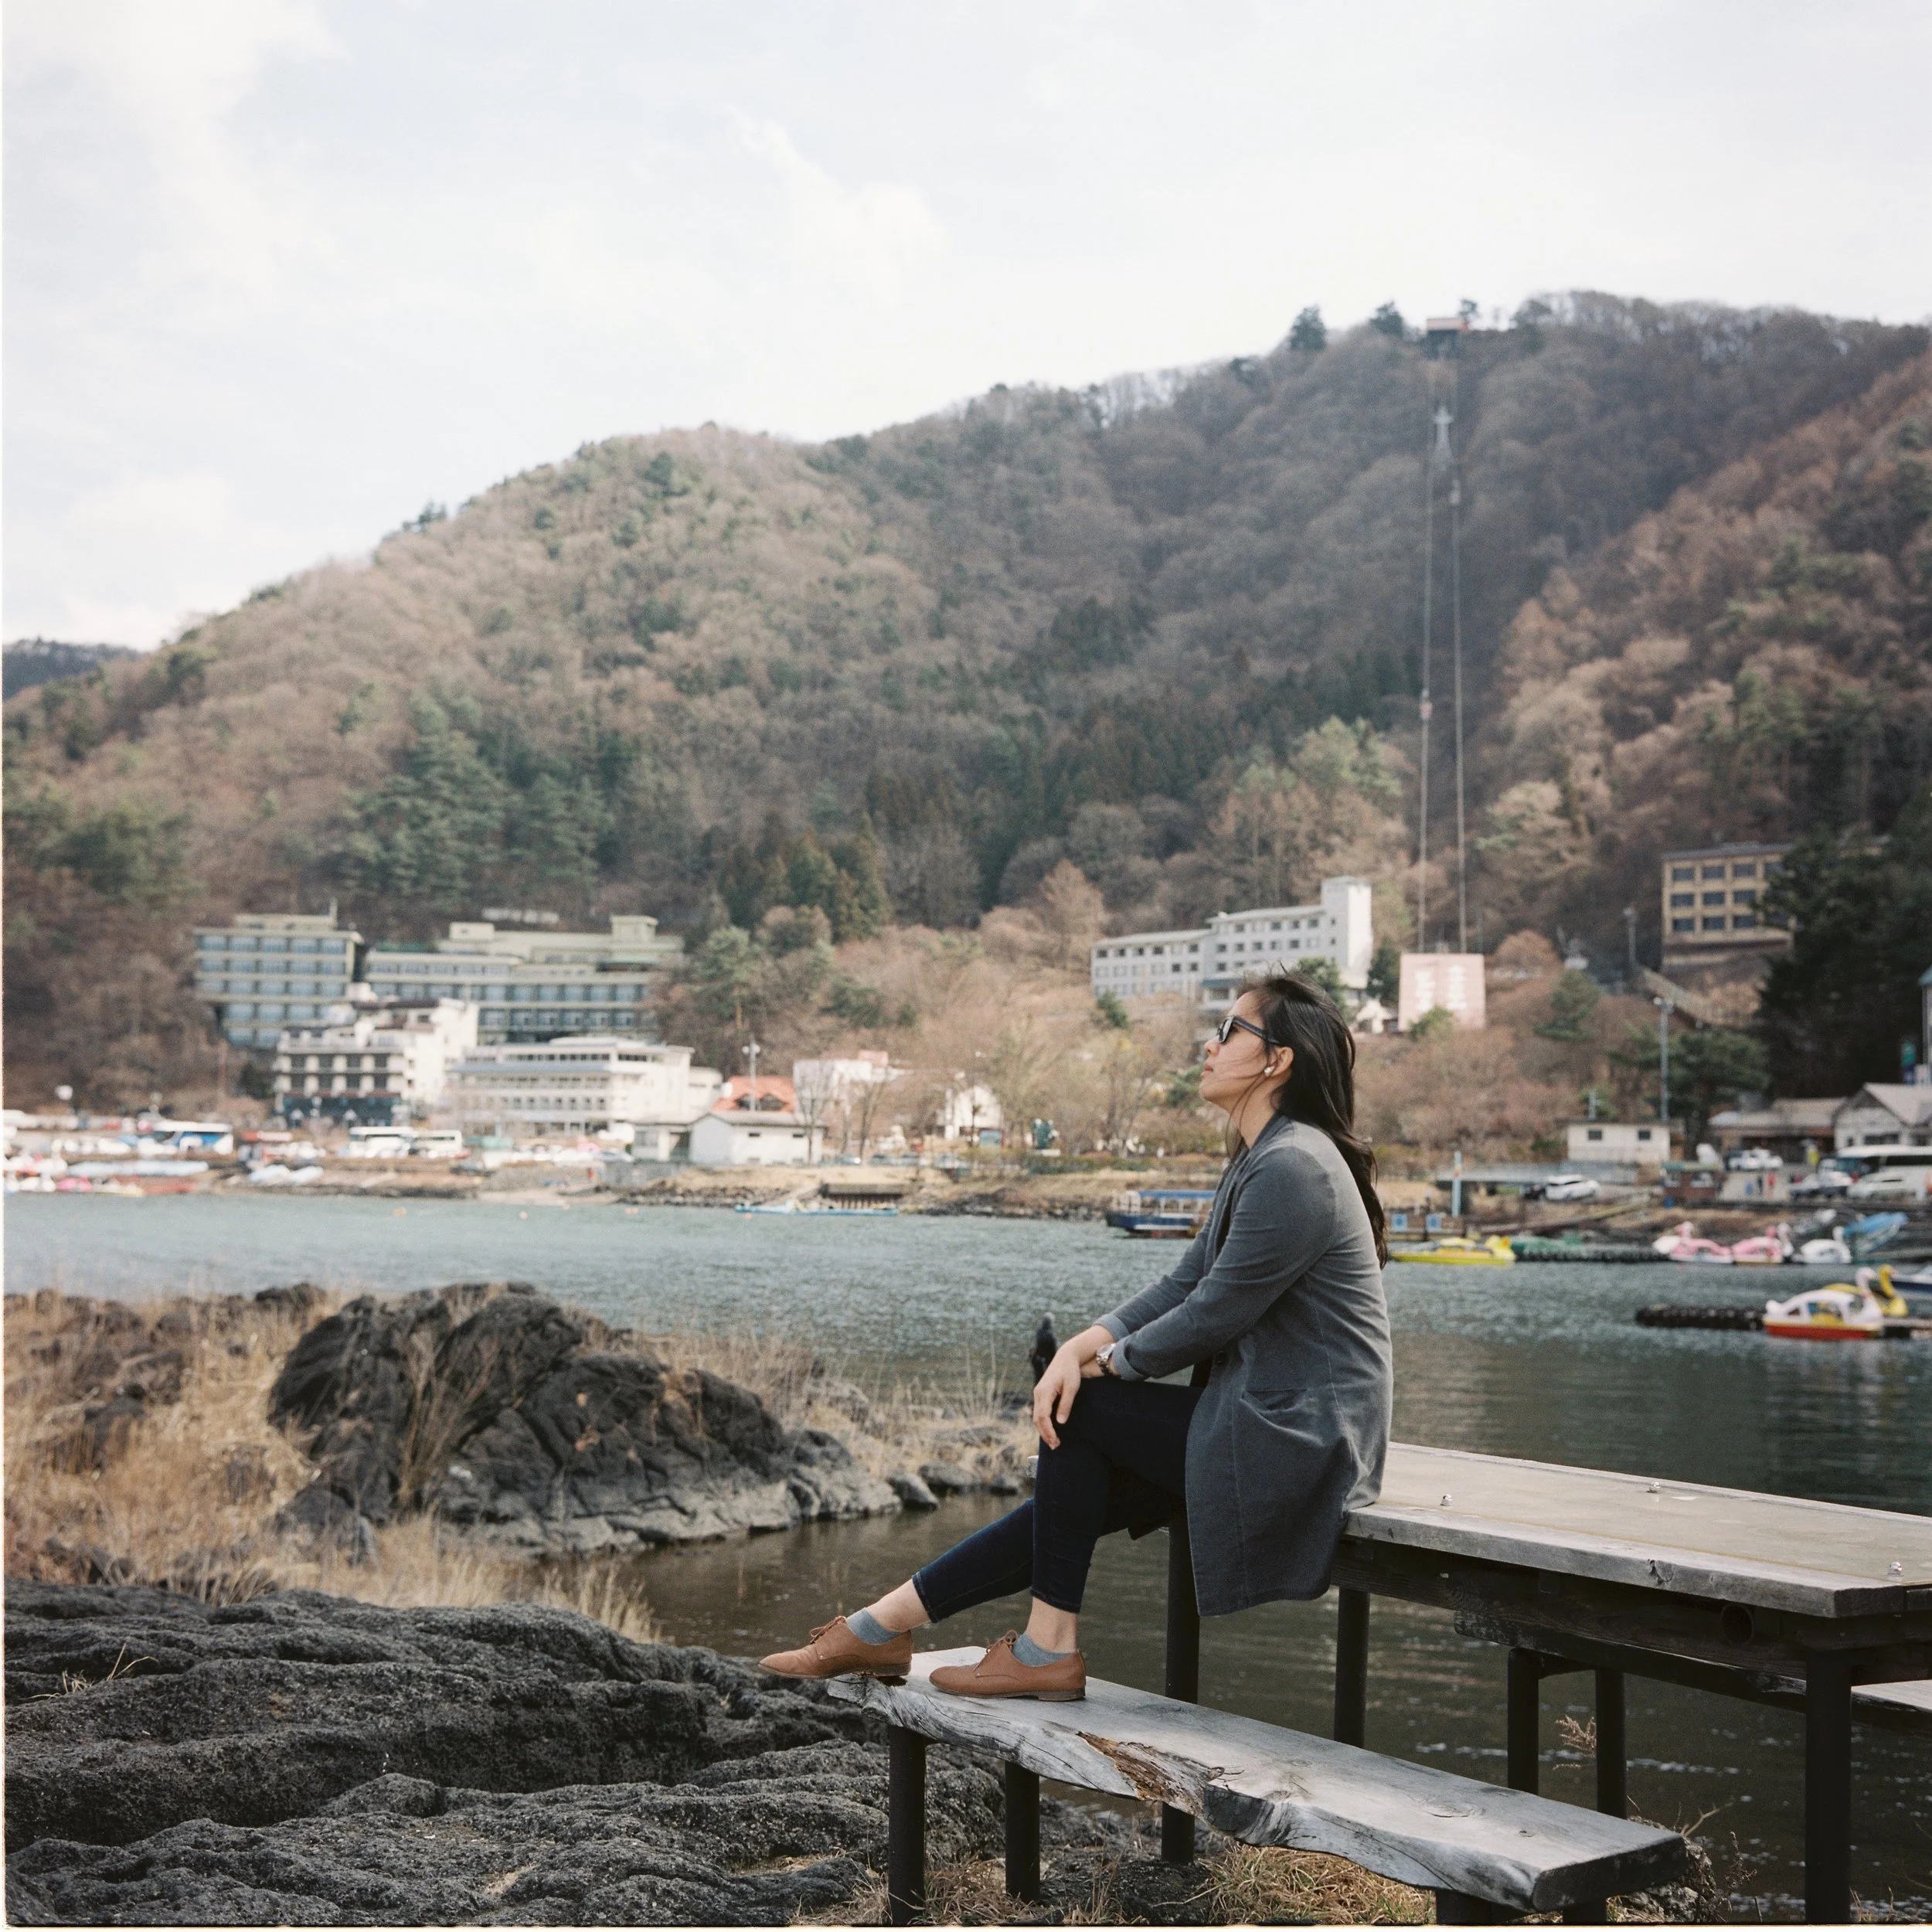
Below are 3 examples taken with the same roll of film, Kodak Portra 160 with my Rolleiflex 3.5f. Though it may not be the same exact scene but it does give you a fair indication.  The first photo was shot at perfect exposure while the middle shot was overexposed half a stop to give the skin a little more glow. The last shot was shot under (not intentionally, probably too much sake lol ). As you can see the last photos looks faded, desaturated and grainy as compared to the rest of the images. The middle photo has a lot more pop in term of contrast and colours while the first looks more neutral. Play around with the exposure and see which works best for you!

While as for Pro400H colour film, I generally overexpose the film by one-stop minimum for most scenes. If the lighting is rather flat, I would make it 1.5 over to bring out the colours a little more.


2. Expose for the shadows - I think this the most important key factor that most got it wrong when photographers pick up a film camera. Being a photographer started out with digital cameras , we were told countless times to watch for the over blown highlights as most digital cameras have problems dealing with over exposures. We have been told countless times that over blow highlights are bad bad bad in digital.  However this is not the case with film. The shadows is what matters when you are shooting film. Film have a much larger dynamic range than digital sensors , approx 16 vs 12 stops on the average hence it's able to handle highlights pretty well. However film will suffer once it is under exposed.

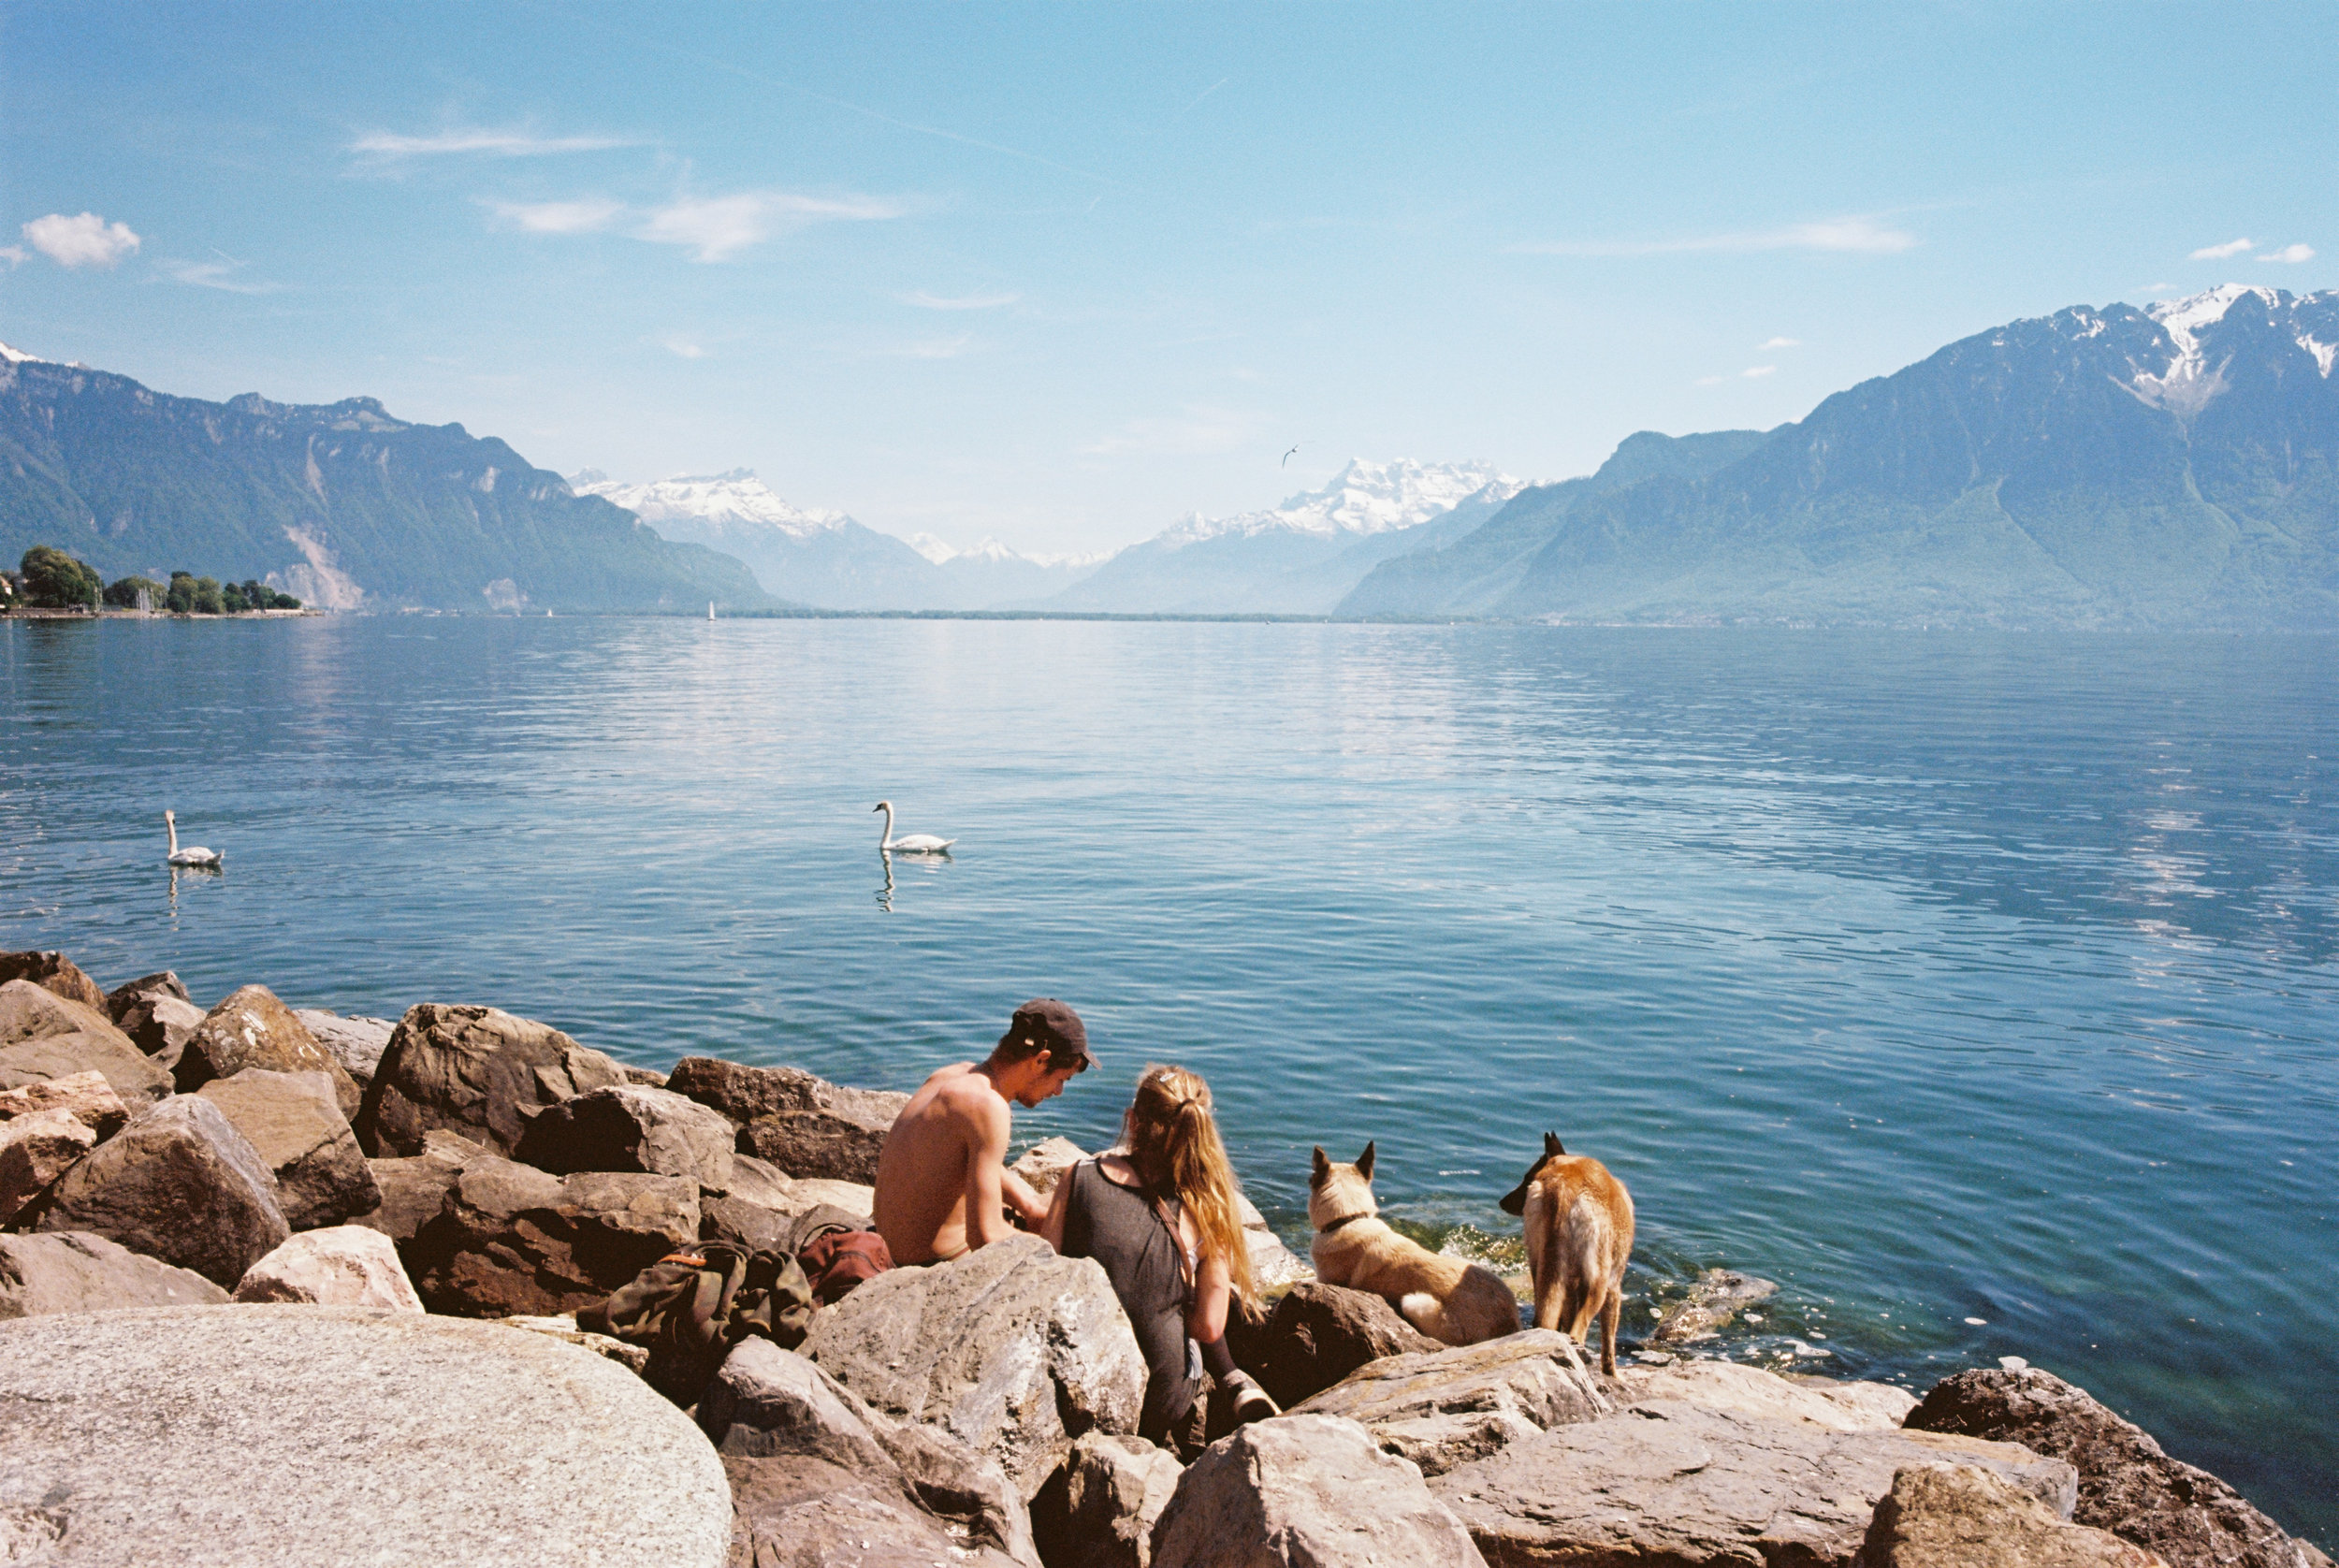
As an example below on the bottom left , I had my wife standing in front of a glacier. On a typical scene like this, the camera exposure will usually under expose the scene thanks to the huge chuck of snow at the background. Knowing that the main subject on this photo would be of course my wife, hence I did a close up metering on her face , walked back and recompose the shot. It turns out perfectly exposed. I would not be able to produce a shot like this if it was shot with a digital camera without doing the HDR function.

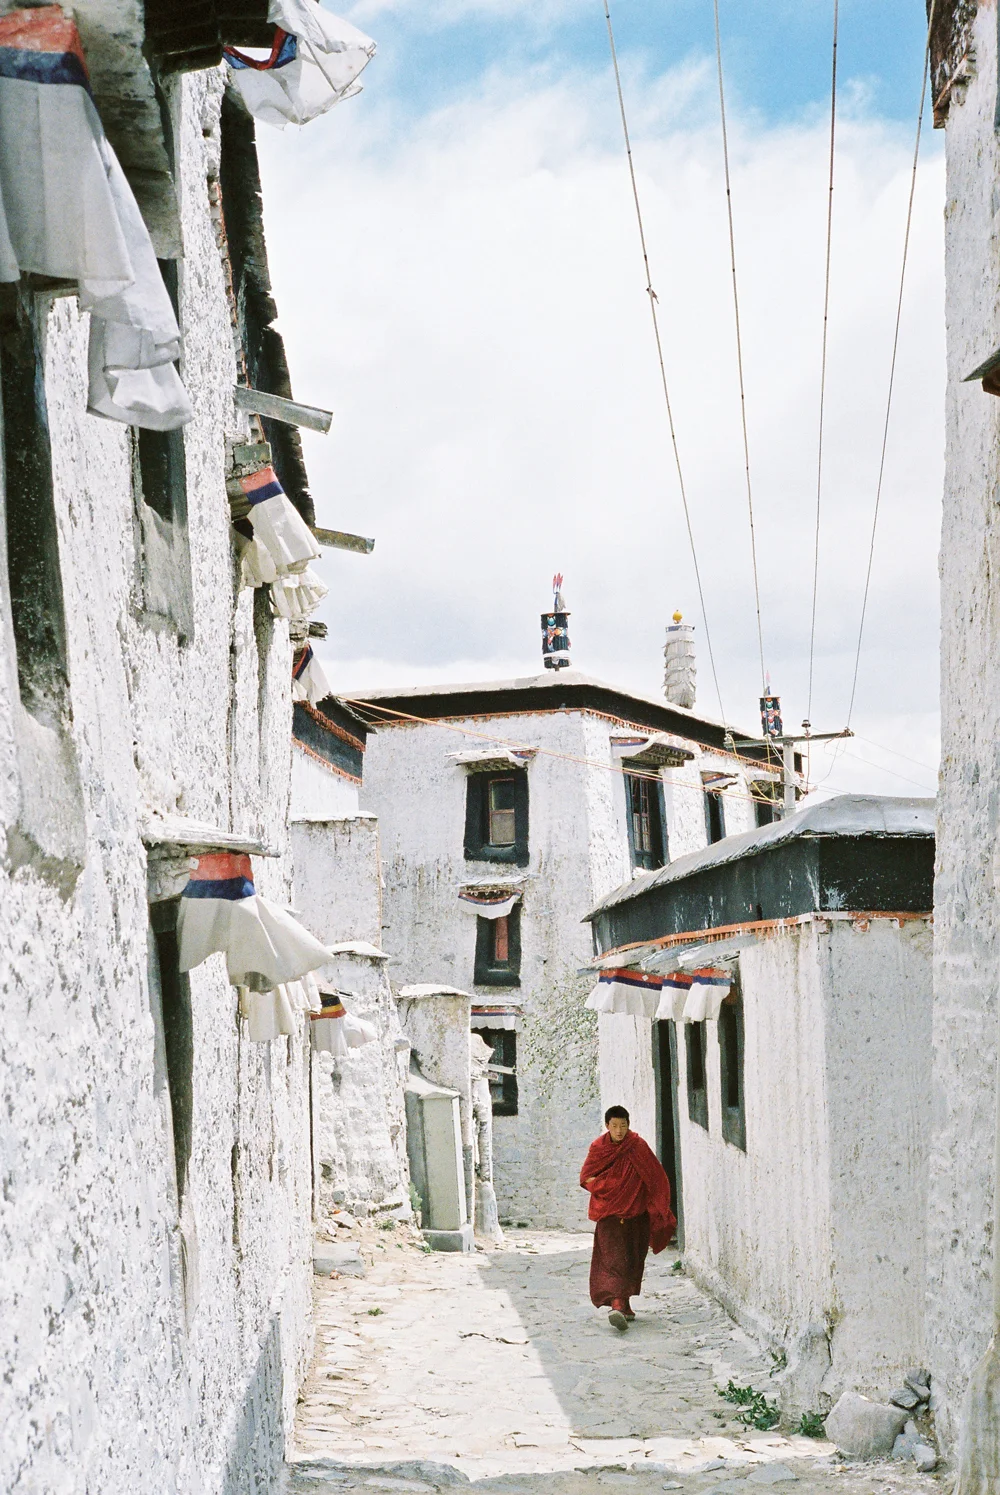
As for the shot of the Tibetan monk, I meter the shadow area which he is as passing through to ensure he is not underexposed. As you can see the highlight on the wall and sky is perfectly intact. That's the beauty of film !

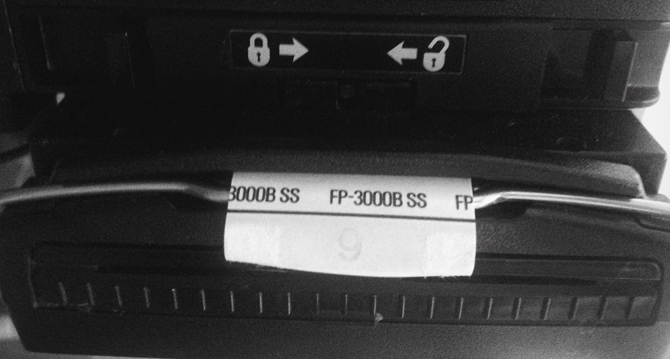
3. Use film within the best before date   - Always use the film within the film shelf life period for optimum quality. This includes shooting and developing the film within that period of time. I often try to buy the freshest film possible so I would have sufficient storage and usage time. Standard film would have around 1.5 to 2 yrs of shelf life hence check always check the film expiry date  just like how you buy a loaf of bread or a fresh carton of milk from the mart. Expired film may look cool sometimes if you are lucky but usually it tend to be more grainy and the colors are highly unpredictable.


4. Don't be over ambitious - Spend time to know your film more before switching  to another type of film.  Every film has it’s own characteristics in term of colors, details, latitude and preferred exposure method. For example , Kodak Portra works best with 0.3 stop over exposure while Fuji Pro400 H needs a minimum of 1 stop over exposure to give the creamy pastel colors.  Kodak Ektar and black and white film works best with perfect exposure . Try out 5 rolls of the same film before switching it out and see which works best for your work.

From left to right  Fuji Pro400H - Creamy pastel color with soft highlights , great skin tone | Kodak Ektar 100 - Sharp, punch contrast, low grain and punchy red color. Fuji Superia - High contrast,  harsh highlights and accesntuate on green color.                         

5. Black and white and color film exposes differently - When I shoot with black and white and color film, I think very differently. For colors I usually look for even exposure scene and I expose for the shadows as what I have explained in point 2. However for BW film, I prefer to hunt for subject or scene which has more dramatic lighting , after all it's the shadow and highlights of a photos that makes a black and white film 'black' and 'white' . I never liked a BW film being too flat without shadows. Hence every time I travel , I often carry two cameras one loaded with box speed or pushed  black and white film while another loaded with color film so that I could switch between the two depending on the lighing condition.

4 Comments

10 Comments

The Best Polaroid Camera - Polaroid 600SE

polaroid 600se

Last year, I was lucky enough to get my hands on a unit of Polaroid 600SE aka GOOSE instant camera at a relatively low price on ebay. I've been dreaming to get this camera for a very long time . Thanks a lot to my Polaroid fanatic friend , Afoi for the poisoning lol.

The Polaroid 600SE is truly an awesome instant rangefinder camera ! It is the “flagship” professional cameras for  Polaroid, based on the Mamiya Press design which both the Mamiya and Polaroid have been discontinued for many years. The camera have inter-changeable lens mount and it utilizes Mamiya lenses that produce amazingly crisp images. Being a medium format, the details and bokeh (out of focus rendition)  is indeed awesome. The subject is pin sharp while the bokeh is buttery smooth. The standard lens which comes along with the camera is a fixed 127mm f4.7 lens with Seiko leaf shutter.  There are additional lens option such as the Mamiya 75mm f/5.6  being the wide angle and the Mamiya 150mm f/5.6 as portrait lens are sold separately. I can't comment on these as I haven't got the chance to try out other lenses just yet.


Tips on Using the Polaroid 600SE

Using this camera at first seems a little quirky for most people, it’s LEFT HANDED and not to mentioned it weighs a ton ( almost 1.7kg ) !  You could easily use this as a dumbbell substitute when you feel like working out. Operating this camera is fairly easy as this is a fully mechanical, just need to remember the sequence. For those those is used to shooting with film medium format camera it would be pretty much at home for them. Here are the steps in short:

1. Getting the film - This camera uses the Fp100c ( color film 100 iso ) and Fp3000b ( black and white 3000 iso ) instant film manufactured by Fujifilm. It's sad to say that Fuji in the recent month has just discontinued the black and white FP3000b film pack hence if you have the chance....do stock up ! It's one of my favorite instant film and the flexibility of 3000 iso is simply awesome. A packet is around RM65 now for a box of 10 exposures. I used to get it for as low as RM46/ box previously before the announcement of discontinuation.   If you could buy in bulk, you could certainly save some money but do bear in mind of the expire date.

2. Load the film into the film back - This is one tricky part which most people got it wrong. First, make it a habit to check and clean the rollers of the film back. The built up gooey like substance from the fp instant film will hinder the movement of the roller. Just use a damp cloth and to clean the side of the roller contact point when necessary. Just make sure the roller moves freely as the added friction might cause the film tab to break and the entire pack of film will be wasted.

To install, pull up on the latch to open the film holder door, the door does not open flat hence don't force it. Always hold the film pack by the edges, not in the center. Slide the pack in at an angle, then push it down into place. If done correctly the film pack will be flush with the sides of the holder. Check that the white tabs are not caught between the pack and the holder. It needs to hang out of the film case. Close door and latch the metal hook to the holder. The final outcome should be as below. You would need to pull out the first sheet of the film to start using. That would get you at frame no.1 as indicated.

3. Metering - As the camera doesn't have a built in light meter, one would have to use an external light meter instead. I would suggest that you get the awesome Voigtlander VC2 meter and attach it onto the hand grip hot shoe. This is interchangeable with most cameras like Leica M and Nikon SLRs. If you have other light meters, feel free to use it too. I wouldn't suggest to use sunny 16 rule for instant film as the exposure latitude is not as wide as normal film . Further more price per exposure is relatively high around Rm6 per shot hence you would really want to get it right the first time.

4. Remove dark slide - Remove the dark slide when you are ready to shoot. Pretty simple and no explanation needed. Make sure you keep the dark slide back on when it's done as finding a used / replacement would be a bit costly.

5. Cock the shutter - you need to cock the shutter at the lens before pulling the trigger with your left hand. Just pull the lever down towards the left side until it clicks.

6. Exposure , Focus , Shoot  - Set the shutter speed and aperture on the lens.  Focusing on the 600SE is pretty much like all other rangefinder camera.  You just need to focus the image by aligning two images together at the little square box in the middle. Once done, just pull the trigger at the hand grip.

7. Removing the exposed film - Unlike most of the Polaroid cam which we a familiar with since our childhood where the film will be ejected automatically from the bottom of the camera with a loud winding sound, this 600SE operates rather differently. It's a two step process. First you have to pull out the white color film tab manually to activate the developing chemicals as per dig.40.  Then the second film tab will eject from the film back. Just pull the entire sheet out ( dig.41 ) in one single motion. It could be a little tight for the first few sheets but once you reach exposure 4, it should be a lot easier. Just wait for around 40 sec and you may peel off the instant film starting from the edges as per dig.42.

Screen Shot 2014-10-08 at 1.58.08 AM.png

Features

  • Variable aperture and shutter settings: Enables better stop- action and depth-of-field
  • Bright-image coincidence type rangefinder: Ensures sharp focus and accurate framing
  • Sturdy hand grip with adjustable hand strap: Simplifies handling and operation
  • Comes with standard Mamiya 127mm f/4.7 lens ~ produces incredible crisp, full-range images
  • Other coated, color-corrected lenses available

Specification

  • Shutter: 1/500-B with X-synch for flash
  • Flash: Uses conventional flash with X-synch
  • Interchangeable backs for flexibility ( Polaroid or film back )
  • Die cast aluminum body
  • no built in TTL metering. I usually use my iPhone light meter application and it works great

( Spec sheet plugged from camerapedia )

Below are some of the images which I have taken while experimenting with this camera. I’m using the Fujifilm FP3000B film for this series and it’s great for indoor studio purpose due to the 3000 ISO. This film is very stable as compared to the IMPOSSIBLE PROJECT Polaroids which I will touch on later when I have time. I’m not a big fan of the the color version of the Fuji FP100C as the pictures always turn out more cold. Not sure why but some pack might turn out nicer than the other even it’s shot under the same exposure. I have tried two packs which the color is slightly more magenta and I love it lots but I’m still trying to figure out why the variation.

So what’s the verdict you might ask ? I think it’s an awesome camera to have specially for those who love instant film. Image quality is superb and being medium format, the out of focus rendition is really smooth and tonal graduation is awesome. However, it’s really huge and heavy. Lugging it around for street photography is a big no no. You will ended up pulling a crowd instead of being discreet. More suited for studio or portrait use. Hope you like sharing and stay tuned for more ! Thanks


PS : Feel free to download the user manual HERE

film photography malaysia polaroid600se

Caution  !!

The Polaroid film process uses a caustic jelly which is safely packed inside sealed containers within the film pack. If accidentally you should get some of this jelly on your skin, wipe it off immediately to avoid an alkali burn, wash the area with plenty of water as soon as possible. It is particularly important to keep the jelly away from eyes and mouth.


10 Comments

4 Comments

8 Tips to Get You Started with Film Photography

MKP_3676.jpg

Planning to take up film photography but not sure where to start ? Here are a few pointers to help you out :

1. Get yourself a camera. A film camera is relatively easy to find. Just ask your dad, uncle, grandma, old friends and relatives and high chances that they might have one for your for free. If luck is not on your side, there is always ebay or and some local online stores such as Film Photography Buy/Sell Community (Malaysia) on Facebook. Not sure which camera to start with , just check out my old blog post on "Which Film Camera to BUY for beginners ?"

2. Give the camera a good check up ! High chances that the film camera which was left lying for years are no longer in optimum operating condition. If it’s purchased off ebay, do check with the seller on the condition. Mint +,  Mint - and Excellent are general term seller use describe their camera condition, so don’t be deceived. A mediocre condition will be graded as good with that sort of grading system. Best to do more research about the camera before investing, even more so on cameras with automation as repair would be really costly or high possibility that there is no more parts available.

Some of the frequent problems which plague mechanical film cameras are deteriorating light seals and mirror bumper, sluggish or inaccurate shutter speed, fungus on lenses and camera viewfinder, inaccurate or dead light meter and corroded battery compartment due to battery leakage. While for Twin Lens Reflex ( TLR ) and Rangefinder cameras, the focus calibration is most crucial. To check, just focus on a very far object like a high rise building and make sure it alligned properly at infinity. If it's not most likely the camera needs to be calibrated.  Most of the above could easily be addressed with a simple CLA  (clean, lubricate and adjustment ) from any trained camera technician for about RM150 or so depending on the condition. If the above are all good, I will normally exercise the shutter around 30 over times on all shutter speed to loosen up the camera gearing and lubrication.

3. Experiments with different films ! There are a few varieties of films out there. Basically you just need to know the format size ( 35mm and 120mm which is the most commonly used ) , ISO and film type ( color negative, slides and black and white ). Always check your camera format before buying.

For starting out, Fuji Superia and Agfa Vista are pretty good for the price. You can easily get your films at my regular photo lab ColorDotCom Digital Photo Lab, Bang Bang Geng or any available online store like ebay and etc. It’s a good beginner film to play with without burning a hole in your pocket. More professional grade films color negative films such as the the Kodak Portra and my all time fav Fuji Pro400H and Kodak Extar cost around RM 20 over per box. For black and white, I use mainly Kodak TriX400 which is my all time favorite and I prefer to do the developing on my own for the extra added contrast. In my humble opinion, that's the most versatile film ever. You could push it 3 stops and still perform reasonably well.

4. LOAD the film into the camera. PLEASE be EXTRA CAREFUL when loading film into any SLR or rangefinder type camera which looks something like this image below. The MOST FRAGILE part of the camera is this shutter curtain. It's actually just a thin layer of metal or cloth like material which controls by the shutter speed dial. When you are loading the film into the camera, do ENSURE your fingers stay off this middle section and don't ever apply any pressure on it else the shutter shutter will bent or break. It happens to me once on my FM2 and it cost around RM300 for a shutter replacement, ouch !

Once the film are loaded into the camera, do ensure the film winder turns ( top left as per photo below as an example ) as you cock the shutter. If it's not turning, most likely the film is not loaded properly. You can always counter double check by turning the film winder to feel if there is any tension on the winder.

5. REMOVE that roll with the upmost care ! This is the most common screw up of all time :) You wouldn't want your hard work and masterpiece gone wasted, if you are not sure read the camera user manual before operating. Trial and error doesn't work all the time ! All film camera user manual can be downloaded from this website and of course a small donation to them would do great considering the effort being taken to digitize all those manuals.

http://www.butkus.org/chinon/

In general, just press the film release button once you are done shooting( film couldn't advance anymore ) and rewind the film as per the direction of the arrow. Keep turning until you feel no more tension on the winder, this may take around 20 to 30 turns in total.

6. Developing and scanning would be the last step. In my opinion, there are two reputable photo lab in Kuala Lumpur that does developing, one being Color Dot Com in Uptown Damansara in which I am currently using and also Bang Bang Geng in Publika. Both of them are pretty good and I am happy with the out come so far. All scanned images will be supplied in jpeg format burnt into a CD or can be transferred online. Hence it's pretty easy

7. Practice makes perfect . Don't be despair if your first few rolls doesn't turn out as nice as you wanted it to be. It takes countless rolls of film and time to master. I have burnt through many rolls of film to finally figure out the characteristic of each film.

8. Don't be overly ambitions. Stick with one film for a certainly period of time before switching. Each film has different characteristic and exposure latitude ( in digital term they call is dynamic range : ) Hence constant switching you get you more confused and it's hard for your to actually know the film well enough.

4 Comments

Leica M3 Review

2 Comments

Leica M3 Review

MKP_3669cv.jpg
MKP_3674.jpg

The Leica M3 is one amazing camera and I absolutely love it to the max. I had this camera for almost 5 years after I bought my Leica M2. I have always loved the design and built  of the film Leica cameras particularly those made in the  early 50’s till early 70’s.The built quality and use of materials are impeccable which explains why it still look pretty darn good after 50 over years. The finish is flawless even till today and it has the smoothest film advance I have ever come upon on a film camera. It feels like it’s running on a layer of butter !

The M3 is the first M series ever produced by Leica in Solms, Germany back in 1954. Equipped with a bright 0.92x viewfinder, 3 frames lines ( 50, 90 and 135 ), a self timer and 1/1000th sec shutter speed is all the features there is in this camera. Pure simplicity and only the essentials. What I love most about this camera ( besides it’s look ) is the viewfinder. It has the clearest and highest magnification viewfinder among all the M series and best of all it’s flare resistant ! The newer M6 classic, M6 TTL and M7 are prone to flare which makes focusing really difficult when shooting against strong lights. Only the recent Leica MP has flare proof RF like the M3. As I love shooting against back light , this is a truly a blessing. 

The 50mm frame is permanently visible, with broad white lines and rounded corners.
The 90 and 135mm frames pop up when the corresponding lens is inserted. Very clever and first in it's class back in that era. 
If there is a need to use 35mm or wider lenses, the M3 with its basically 50mm viewfinder is handicapped and it’s almost impossible to guess the exact frame lines. The only way would be to use the Leica 35mm with auxiliary reducing goggles or an additional 35mm view finder attached to the camera hot shoe. Easy fix indeed.  

There are many variants of M3 in the market due to it's long production life , hence the serial number is the easiest way to gauge which version you are having. Older M3’s adopted the continental shutter speeds (1/25, 1/50, 1/100, 1/250) and later ones the international range (1/30, 1/60 etc.). The first version of the M3 has a smaller viewfinder frame , require double stroke to wind film ( cock twice instead of one time ) and lower ISO / ASA range on the indicator. Later models have subtle upgrades on all these parts. 

Film loading on the M3 is slightly conventional where one needs to remove the spool from the camera. It is indeed a little slower then the M6 quick load style but at least it is the most reliable and fool proof loading method. There are a few times where the film leader wasn’t securely fasten to the take up spool chamber on the M6. I know this is more like a user problem …but the M3 loading method does not have such room for errors. I heard that the quick load kit work wonders by converting the M3 conventional style to more modern M6 style but I was told that the film counter will not reset itself. I can live with it hence not a biggie for me.

I use this camera mainly for black and white photos. I love pairing it with the 50mm f2 dual range Summicron or the 5cm f2 collapsible cron with yellow filters for that classic black and white look. For metering, I’ll either use the sunny 16 rules when I’m outdoor or my trusty light meter apps on my iphone for more tricky lighting condition. Works great for so far and really enjoy using this camera a lot and I am a big fan of 50mm lenses. 

If you ever plan to get one , I would suggest hunt around for a serial number above 950,000 as most likely will have one with all the subtle upgrades implemented. Do check the rangefinder mirror too for signs of desilvering as repair would be costly. Comparing to the M2 , M5 , M6 classic , M6 ttl which I have, the M3 is still one of my all time favourite . 

2 Comments

3 Comments

Why you should own a Rolleiflex SL66 !

photo(5).JPG

The Rolleiflex SL66 is one of those under dogs camera which is not very popular among film shooters. I would say it's a hidden gem among all the 6x6 cameras. Those who love shooting in the studio would go for the ever so popular modular Hasselblad 500cm due to it's wide lens selection, additional motor winder / grips, optional finders, as well as Polaroid back options. Street and travel photographers would prefer the slightly lighter and smaller fixed lens Rolleiflex TLR  like the 2.8 f or 3.5 f. This SL66 I would say it's actually a beast on it's own. I had this camera for almost two years now and have taken quite a lot of images with it and it never fails to surprise. Here are 6 reasons why you should own one !

1. Best for close up portrait - The SL66 is the only few 6x6 format camera which has a bellow besides Mamiya C330. Bronica, Hassellad, Pentacon, Minolta Autocord, Yashica TLR as well as it's siblings Rolleiflex TLR doesn't offer this option.  The bellow enable you to do close up portrait without having to pay for additional extension rings and lenses.

2. It has the amazing Zeiss Plannar 80mm f2.8 - This is the legendary lens which is found on the amazing Hassie as well as the Rolleiflex 2.8f . The 80mm f2.8 Planar has gorgeous rendition and color reproduction. It's constantly spot on and the focal length is very usable. With an added bellow and reverse mount option for close up macro , the possibility is endless without spending a single penny ! For a Hassie, you would need to buy multiple close up extension rings for the same effect.

3. It has tilting bellow  ! As far as I know, only the SL66 has a tilting bellow for 6x6 format which gives your the flexibility of correcting your perspective like a tilt-shift lens. ( minus the shift of course ) . This gives a lot of flexibility for the user to control the focus point and to creature your signature look.

rolleiflexSL66builtin.jpg


4. Modular  - Just like the Hasselblad, the SL66 is just as flexible. You can customize and swap out any parts of the camera as you wish, from the focusing screen , finder, film back , lens, grips and etc. This is never a dull moment with this camera.

5. Fully mechanical - The SL66 is a full mechanical camera, hence there is no battery needed for operation. I always love full mechanical camera as it will just keeps going on and on. A good CLA will bring this camera back to life in no time. The elder siblings SL66E has a more modern  electronic circuit board for the metering but apart from that it's basically the same camera at a fraction of it's price.

6. It's more affordable than a Hassie. Well USED TO be . Comparing in term of price point, the SL66 is a lot cheaper than a regular 500cm and it's packs with tons of goodies. I got  mine 2 years ago for around USD 600 mint condition with a 80mm f2.8 lens with hood as well as a Rolleiflex original leather case. A Hasselblad 500cm is selling for around USD 1000 back then due to the fame with the Hassie brand. However SL66 price has gone up recently on ebay hence you might need to hunt around for a decent unit.


3 Comments